Ah, that dripping roof problem… Isn’t it such an annoying situation that can suddenly wake you up from your sleep? Just think, it’s raining outside and you’re wondering how you’re going to deal with the water dripping inside. In such a case, you have to search for “how to fix a leaking roof from the outside”. It can really ruin a person’s mood. But sometimes, when things get tough, we have to take care of ourselves. Fortunately, if you follow the right path and of course, if you’re a little patient, you can handle this on your own.
Trust me, it’s not that hard!
First, Find the Source of the Leak!
Our first job is to find the source of the leak. Most people say, “Oh, isn’t it obvious where the dripping is?” but it’s not that easy. Sometimes, water can leak from the very top of the roof and show itself much further down. In other words, I can say that we need to do a little detective work to find where the water is really leaking. In fact, sometimes you have to be as careful as a detective while tracking the water; otherwise, you might intervene in the wrong spot.

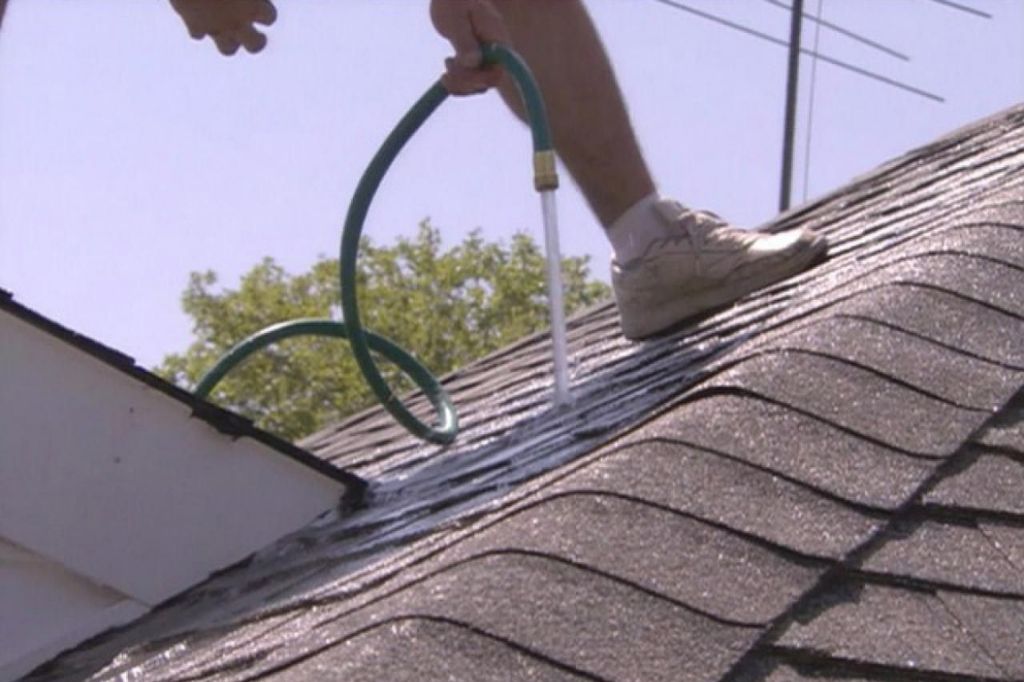
Sometimes, just looking with the naked eye may not be enough. You can also use a garden hose to pour water on different parts of the roof and check where it starts to leak. What I mean is, it’s best not to start a repair without identifying the source. Be patient and follow the path of the water. Although this process may seem long, it will make the repair much easier, rest assured.
Be especially careful around sensitive areas such as the chimney, vents, and roof corners. Most leaks start from here and can be difficult to spot. Don’t move on to the next step without making sure you’ve examined everything thoroughly!
Gather the Necessary Materials and Tools
Okay, let’s say we’ve located the leak. Now we need to prepare the materials we need. An old paintbrush or a piece of wood you found on the roof won’t do the job. This requires special materials; for example, roof patching, roof mortar, and maybe roofing nails to ensure the roof’s seal. Even gloves and a sturdy ladder will make your job easier.
In order not to do this job half-assed, buy quality materials. The roof is constantly exposed to external factors, so the products you’ll use to repair the roof must last a long time. Remember, bad weather conditions can be very dangerous for this type of repair, so it makes sense to choose a sunny day. So yes, follow the weather forecast!
Do you have your tools ready? Then you are good to go. Now we will do our best to fix the roof. It may seem a bit difficult, but you will find that the work goes much easier when you have all the tools at hand.
Clean the Area and Make it Spotless
Now we come to the most important, yet most neglected part of the job: cleaning. Cleaning the area where the roof leaks is essential for the repair materials to adhere well to the surface. Think about it, the roof may have been covered in rain, mud, wind, and even bird droppings for years. So grab a sturdy brush and make the area sparkling clean.

Especially if there is old roof mortar or old crack fillers, completely scrape them off and create a new surface. Remember, a clean surface means a solid patch in roof repair. Otherwise, the dirt or old mortar left there will prevent the new materials from adhering. Dealing with all these details may seem tedious, but you don’t want to repair the same place again and again.
After cleaning the area, let it dry. Be patient; a damp surface will weaken even the finest materials. Once the cleaning is complete, you will see how much easier things become.
Fill Small Cracks and Gaps
If the leak is caused by a small crack or gap, we can say that the job is easier. Fill the crack with the roofing mortar you have. Whatever material is used to repair the roof, applying it in a thick layer will make the job more solid. Press it carefully into the crack and make sure that you fill all the gaps.
After applying the mortar, wait for it to dry a little. Do not rush this job; because drying it properly will completely prevent the leak. Otherwise, you will encounter the same problem again with the first rain. Make sure that you cover the entire area; even the smallest gap can cause water to leak again.
Take a look again the next day; it will reassure you that everything is well covered. Waiting another day will not put you in trouble; on the contrary, you will not have to do the repair again.
Replace or Repair Damaged Tiles…
In some cases, we encounter a bigger problem than cracks or gaps: broken or cracked tiles. In such cases, just closing the crack is not enough, it may be necessary to replace the damaged tiles. Be careful when removing the damaged tiles, so that they do not break.
When placing the new tiles, fix them with nails and make sure that the tile fits perfectly. Be careful not to press the nail too hard when fixing with nails; otherwise, the tile may crack. If everything is OK, fix the edges with mortar or another filling material and make sure everything fits properly.
It may seem challenging at first, but the peace of mind when you repair the roof is really worth it. Knowing that you have protected your home and not having to worry every time it rains is a great feeling.