Now, if you’ve got a mobile home with a leaking roof, let me tell ya, you’re not alone! It’s a really common issue, yet nobody talks about it enough. The truth is, dealing with a leak in a mobile home feels different; the materials, the build, the shape, all of it! So, I’ll walk you through how to repair a roof leak on a mobile home without making it a huge fuss.
By the time we’re done, you’ll feel more than ready to tackle this pesky issue yourself, and that’s a promise.
Finding the Leak: The Real Hunt Begins
Alright, so first things first, ya gotta find where the leak is. I mean, sometimes it’s easy to spot, but let’s be honest; a lot of the time it’s like playing hide and seek with water. You’ll probably see a stain somewhere, maybe on the ceiling, or maybe there’s just a drip that’s driving you nuts. Thing is, with these roofs, water can travel a bit, meaning where you see the leak might not actually be where it’s starting from. Frustrating, right?
One trick I learned, from an old buddy of mine who’s been in mobile home repair for ages, is to try looking for leaks on a rainy day. Seriously, if it’s already wet outside, you’ll be able to spot any sneaky drips or water pools a lot easier. But if that’s not possible, even just spraying the roof with a garden hose can work. Just get a friend or a family member to check inside while you’re up there with the hose. Finding the right spot might take a while, but this step’s gotta be done before any repair work even starts.
And yeah, sometimes you’ll find it’s something as small as a nail hole or a tiny crack. Other times, it could be a whole seam that’s come loose. It’s all about taking your time with this step; that patience is what’ll save you from doing the repair over and over again.
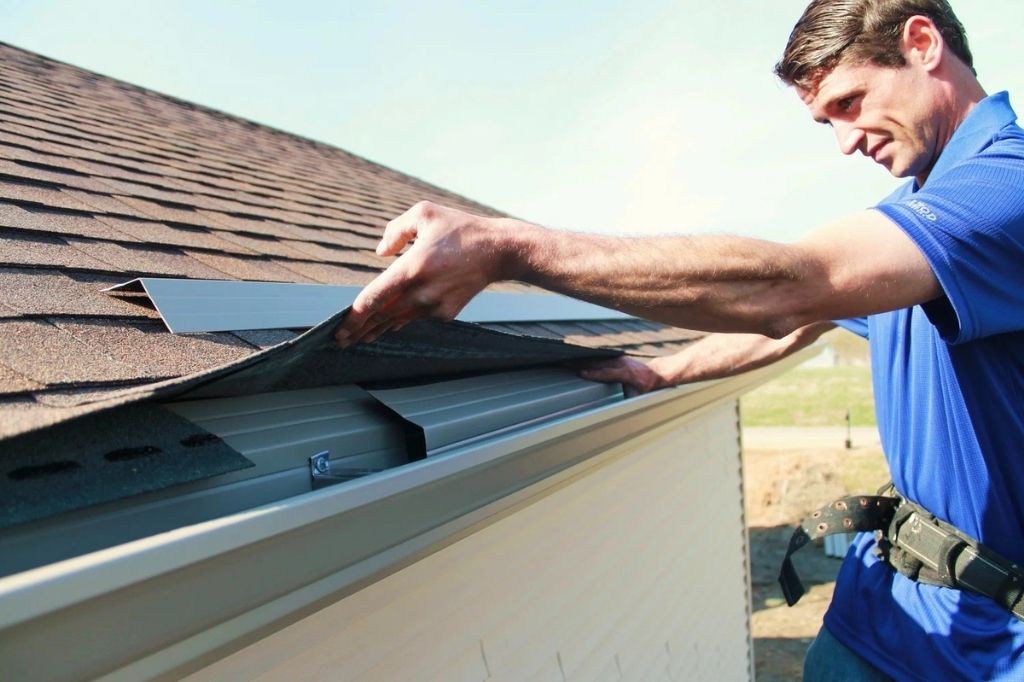
Gathering Up the Right Supplies
Here’s a funny story: when I first tried patching up my own mobile home roof, I used whatever sealant I could find lying around. Big mistake. See, these roofs, they’ve got their own quirks. Most mobile homes either have rubber, metal, or sometimes fiberglass roofs, and you really need to match your repair materials to that specific type. That’s one thing that can make mobile home roof repair a bit trickier.
If it’s a rubber roof, look for rubber-friendly sealant. If it’s metal, go for metal-safe stuff. Trust me, I’ve learned this the hard way. Imagine putting in all that work, then next time it rains, you realize it’s all just washed away. Not fun. So, your shopping list? Sealant, a trowel, a caulk gun, gloves, a good ladder, and maybe even replacement patches if the leak is a big one. Better to have too much than to be running back to the store halfway through.
Oh, and one more thing; safety gear! I know, I know, it’s easy to ignore that part, but mobile home roofs aren’t always the sturdiest. Having gloves, some non-slip shoes, and maybe a buddy to keep an eye out for you is all worth it. Besides, once you’re up there, the last thing you wanna do is rush.
Cleaning the Area (It’s More Important Than It Sounds)
Alright, so now that you’ve got your materials, the next step is cleaning up the spot around the leak. It might not seem like much, but any dust, dirt, or debris can actually mess with how well the sealant sticks. I know folks who’ve skipped this part, thinking it’s no big deal, only to have their repair work fall apart a week later.
Just take a brush or a cloth and clean off any dirt. If you see algae or anything slimy, give it a little scrub; maybe with some soap and water. But make sure it’s completely dry before moving on. Wet surfaces don’t mix well with sealant, trust me on that one. And once you’re done cleaning, take a close look again. Sometimes cleaning can reveal even tinier cracks or weak spots you didn’t see before. Fixing those little things now will save you from headaches later.
This part might sound boring, but it’s the secret to a repair that lasts. Taking your time here really makes a difference. It’s like the foundation; if you don’t get it right, everything you build on top won’t hold.
Applying the Sealant: Time to Patch it Up!
Alright, here’s where the fun begins; actually patching up that leak. Now, depending on the size of the leak, you’ll either use a sealant by itself or need a patch material, especially if it’s a bigger hole. Just start spreading the sealant around the area, making sure you get a good, thick layer over the whole crack or gap.
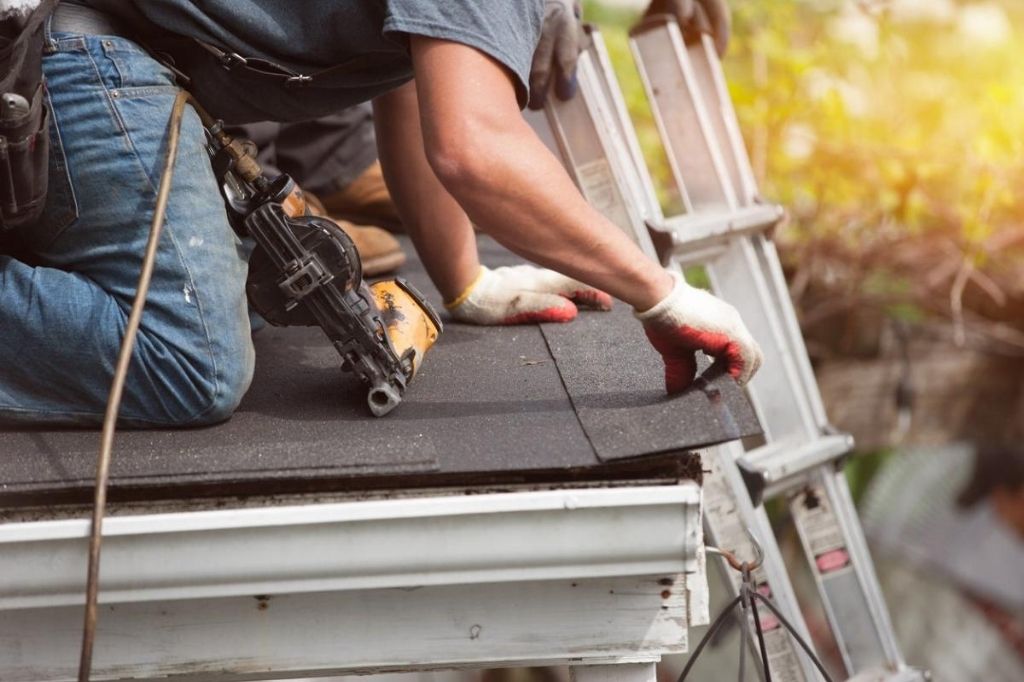
If you’re using a patch, be generous with the sealant underneath it too. Press down firmly so it sticks well, and don’t be shy about putting extra sealant around the edges. You don’t want any sneaky drips working their way under there. Also, avoid bubbles or wrinkles in the patch, as those can weaken the seal over time. Once you’ve got it all in place, let it dry completely. Sometimes, depending on the weather, you might wanna leave it overnight to be safe.
Once it’s dry, give it another look. Don’t be afraid to add another layer of sealant if you’re unsure. It’s all about getting it as watertight as possible. Remember, the whole point here is to prevent any water from sneaking back in.
Testing Your Work (The “Fingers Crossed” Moment)
Now, I know what you’re thinking; all done, right? Well, not quite. Before calling it a day, it’s super important to test your work. Otherwise, you might end up surprised next time it rains. The best way to test? Take that garden hose again, and gently spray water over the patched-up spot. Keep an eye inside to see if there’s any trickling water sneaking through.
It’s always a good idea to have a friend inside while you’re testing outside. They can keep an eye out for any small signs of a leak. If there’s even a hint of water coming through, you’ll need to add another layer or check for any missed spots. Honestly, it’s a bit nerve-wracking, but better to catch a problem now than during the next big storm.
Testing might seem like overkill, but trust me; that peace of mind is worth it. Once you’ve tested and everything’s dry and clear, you can finally relax knowing you’ve got a solid fix.
Keeping Your Roof Leak-Free
Alright, so you’ve patched up the leak, tested it, and everything’s good to go. But here’s the thing; this doesn’t mean your roof will stay perfect forever. Mobile home roofs need a bit of regular care to keep them leak-free. Every few months, give your roof a quick check. Look for any new cracks, bubbles, or signs of wear.
It’s also smart to clear off any leaves or debris that collect up there. I know it’s easy to put off, but a clean roof stays leak-free longer. And every couple of years, think about putting a fresh coat of sealant on the roof to keep it extra protected. It might sound like a hassle, but it’s way easier than having to do a full repair job every time it rains.
With a little maintenance, you can avoid those pesky leaks altogether. After all, a roof that stays dry is a roof that lets you sleep peacefully at night, rain or shine.